🔍
Rover
Reverse engineer your CNNs, in style
Rover will help you break down your CNN and visualize the features from within the model. No need to write weirdly abstract code to visualize your model's features anymore.
-
✔️ Can be hosted on google colab -
✔️ Supports custom PyTorch models (not justtorchvision.models) -
✔️ hackerman modefor crafty people who want to write their own objective functions.
💻
Usage
git clone https://github.com/Mayukhdeb/rover.git; cd rover
install requirements:
pip install -r requirements.txt
from rover import core
from rover.default_models import models_dict

core.run(models_dict = models_dict)
and then run the script with streamlit as:
$ streamlit run your_script.py
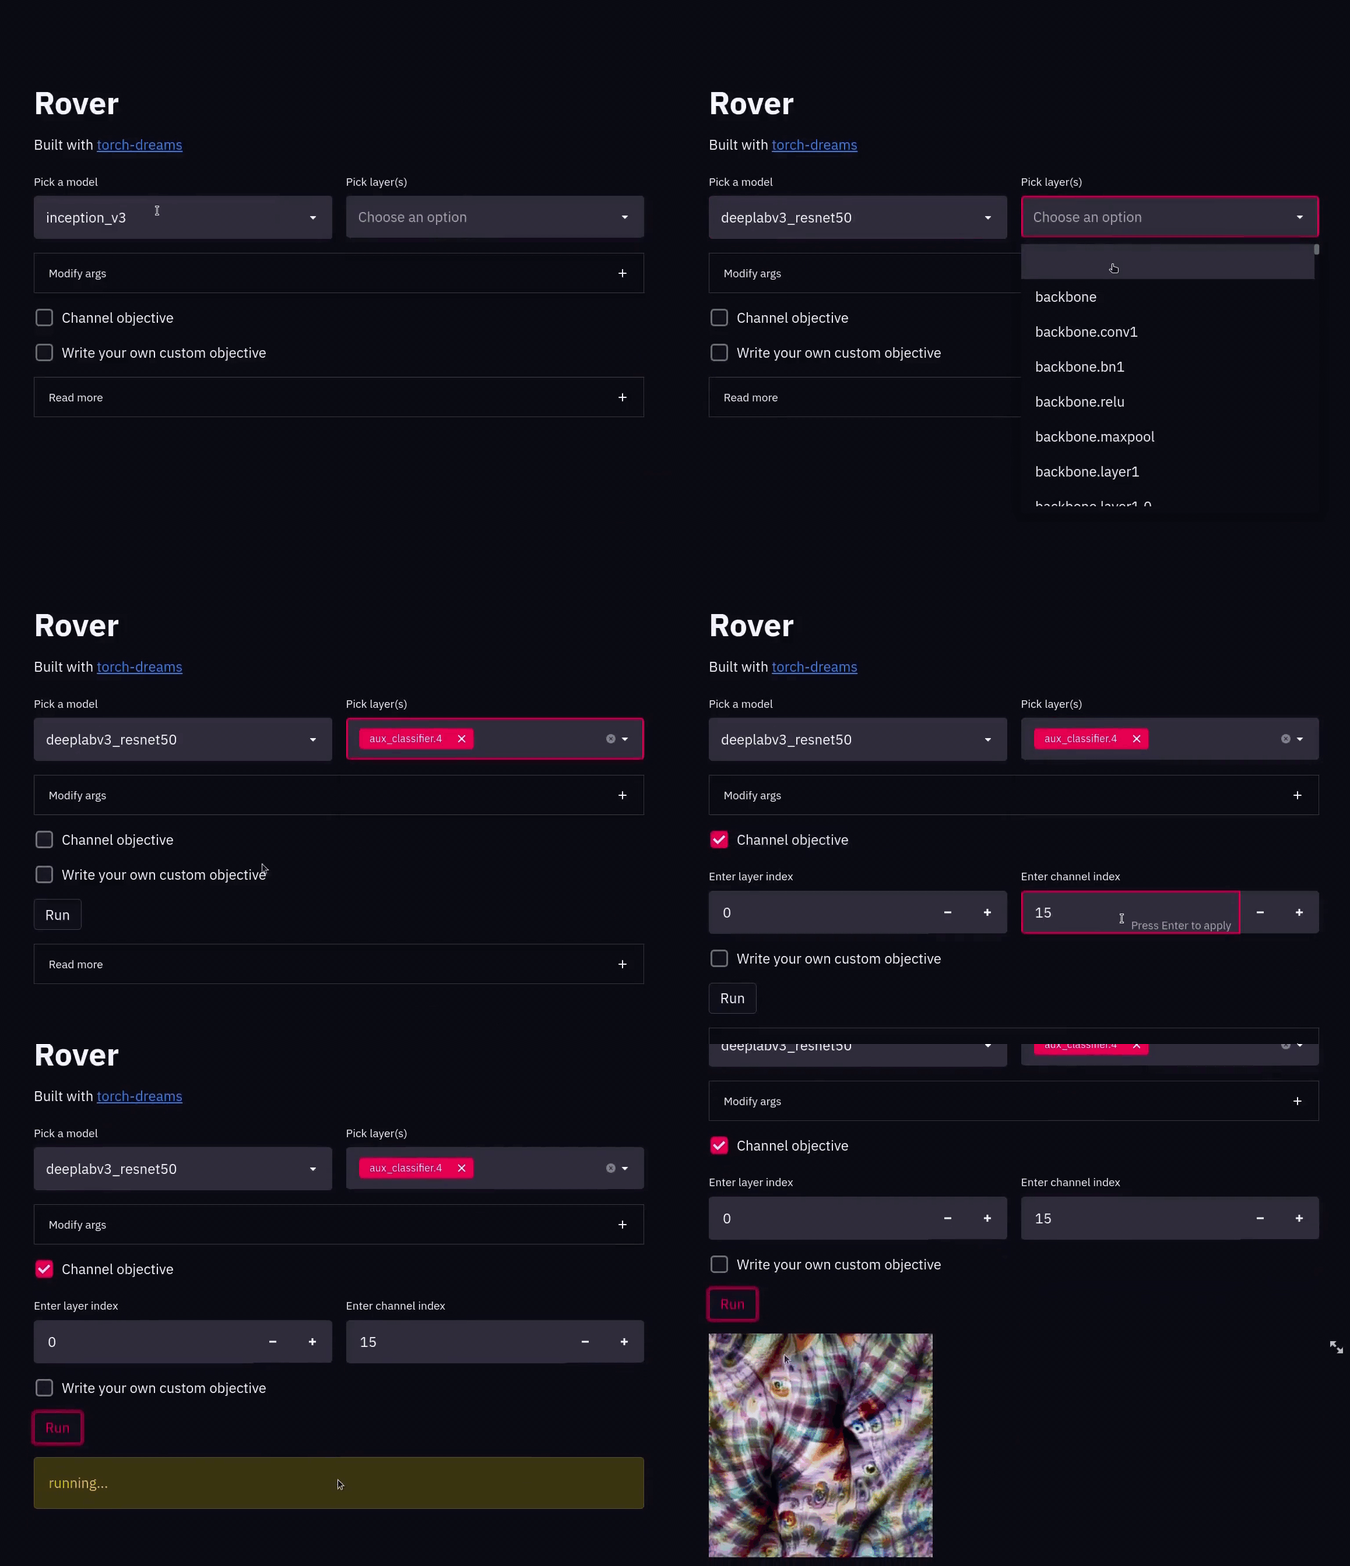
if everything goes right, you'll see something like:
You can now view your Streamlit app in your browser.

  Local URL: http://localhost:8501
🧙
Custom models
rover supports pretty much any PyTorch model with an input of shape [N, 3, H, W] (even segmentation models/VAEs and all that fancy stuff) with imagenet normalization on input.
import torchvision.models as models
model = models.resnet34(pretrained= True)  ## or any other model (need not be from torchvision.models)

models_dict = {
    'my model': model,  ## add in any number of models :)
}

core.run(
    models_dict = models_dict
)
🖼️
Channel objective
Optimizes a single channel from one of the layer(s) selected.
- layer index: specifies which layer you want to use out of the layers selected.
- channel index: specifies the exact channel which needs to be visualized.
🧙♂️
Writing your own objective
This is for the smarties who like to write their own objective function. The only constraint is that the function should be named custom_func.
Here's an example:
def custom_func(layer_outputs):
    '''
    layer_outputs is a list containing
    the outputs (torch.tensor) of each layer you selected

    In this example we'll try to optimize the following:
    * the entire first layer -> layer_outputs[0].mean()
    * 20th channel of the 2nd layer -> layer_outputs[1][20].mean()
    '''
    loss = layer_outputs[0].mean() + layer_outputs[1][20].mean()
    return -loss
Running on google colab
Check out this notebook. I'll also include the instructions here just in case.
Clone the repo + install dependencies
!git clone https://github.com/Mayukhdeb/rover.git
!pip install torch-dreams --quiet
!pip install streamlit --quiet
Navigate into the repo
import os
os.chdir('rover')
Write your file into a script from a cell. Here I wrote it into test.py
%%writefile  test.py

from rover import core
from rover.default_models import models_dict

core.run(models_dict = models_dict)
Run script on a thread
import threading

proc = threading.Thread(target= os.system, args=['streamlit run test.py'])
proc.start()
Download ngrok:
!wget https://bin.equinox.io/c/4VmDzA7iaHb/ngrok-stable-linux-amd64.zip
!unzip -o ngrok-stable-linux-amd64.zi
More ngrok stuff
get_ipython().system_raw('./ngrok http 8501 &')
Get your URL where rover is hosted
!curl -s http://localhost:4040/api/tunnels | python3 -c \
    "import sys, json; print(json.load(sys.stdin)['tunnels'][0]['public_url'])"
💻
Args
width(int, optional): Width of image to be optimizedheight(int, optional): Height of image to be optimizediters(int, optional): Number of iterations, higher -> stronger visualizationlr(float, optional): Learning raterotate (deg)(int, optional): Max rotation in default transformsscale max(float, optional): Max image size factor.scale min(float, optional): Minimum image size factor.translate (x)(float, optional): Maximum translation factor in x directiontranslate (y)(float, optional): Maximum translation factor in y directionweight decay(float, optional): Weight decay for default optimizer. Helps prevent high frequency noise.gradient clip(float, optional): Maximum value of the norm of gradient.
Run locally
Clone the repo
git clone https://github.com/Mayukhdeb/rover.git
install requirements
pip install -r requirements.txt
showtime
streamlit run test.py


