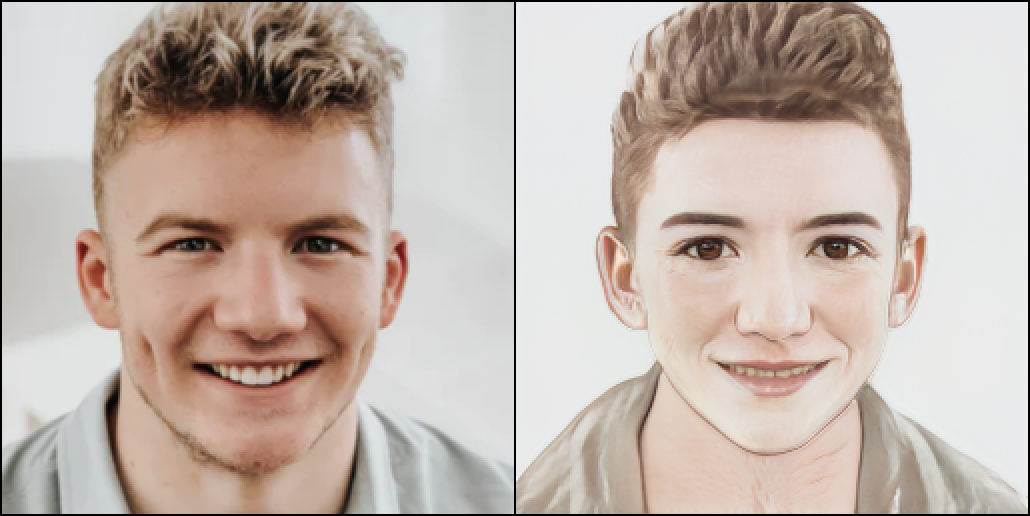
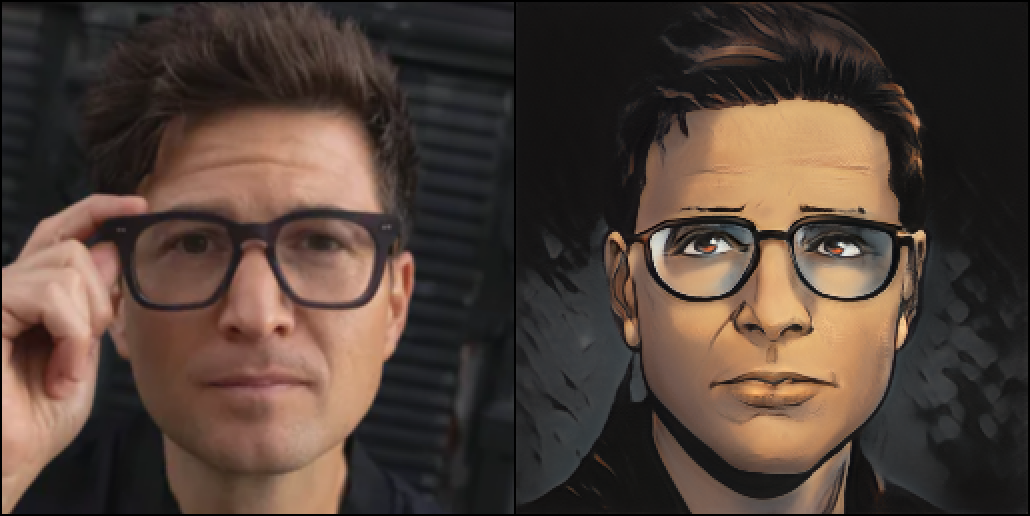
An efficient toolkit for Face Stylization based on the paper "AgileGAN: Stylizing Portraits by Inversion-Consistent Transfer Learning"

Overview

MMGEN-FaceStylor

English | 简体中文

Introduction

This repo is an efficient toolkit for Face Stylization based on the paper "AgileGAN: Stylizing Portraits by Inversion-Consistent Transfer Learning". We note that since the training code of AgileGAN is not released yet, this repo merely adopts the pipeline from AgileGAN and combines other helpful practices in this literature.

This project is based on MMCV and MMGEN, star and fork is welcomed 🤗 !

Results from FaceStylor trained by MMGEN

Requirements

  • CUDA 10.0 / CUDA 10.1
  • Python 3
  • PyTorch >= 1.6.0
  • MMCV-Full >= 1.3.15
  • MMGeneration >= 0.3.0

Setup

Step-1: Create an Environment

First, we should build a conda virtual environment and activate it.

conda create -n facestylor python=3.7 -y
conda activate facestylor

Suppose you have installed CUDA 10.1, you need to install the prebuilt PyTorch with CUDA 10.1.

conda install pytorch=1.6.0 cudatoolkit=10.1 torchvision -c pytorch
pip install requirements.txt

Step-2: Install MMCV and MMGEN

We can run the following command to install MMCV.

pip install mmcv-full -f https://download.openmmlab.com/mmcv/dist/cu101/torch1.6.0/index.html

Of course, you can also refer to the MMCV Docs to install it.

Next, we should install MMGEN containing the basic generative models that will be used in this project.

# Clone the MMGeneration repository.
git clone https://github.com/open-mmlab/mmgeneration.git
cd mmgeneration
# Install build requirements and then install MMGeneration.
pip install -r requirements.txt
pip install -v -e .  # or "python setup.py develop"
cd ..

Step-3: Clone repo and prepare the data and weights

Now, we need to clone this repo first.

git clone https://github.com/open-mmlab/MMGEN-FaceStylor.git

For convenience, we suggest that you make these folders under MMGEN-FaceStylor.

cd MMGEN-FaceStylor
mkdir data
mkdir work_dirs
mkdir work_dirs/experiments
mkdir work_dirs/pre-trained

Then, you can put or create the soft-link for your data under data folder, and store your experiments under work_dirs/experiments.

For testing and training, you need to download some necessary data provided by AgileGAN and put them under data folder. Or just run this:

wget --no-check-certificate 'https://docs.google.com/uc?export=download&id=1AavRxpZJYeCrAOghgtthYqVB06y9QJd3' -O data/shape_predictor_68_face_landmarks.dat

We also provide some pre-trained weights.

Pre-trained Weights
FFHQ-1024 StyleGAN2
FFHQ-256 StyleGAN2
IR-SE50 Model
Encoder for FFHQ-1024 StyleGAN2
Encoder for FFHQ-256 StyleGAN2
MetFace-Oil 1024 StyleGAN2
MetFace-Sketch 1024 StyleGAN2
Toonify 1024 StyleGAN2
Cartoon 256
Bitmoji 256
Comic 256
More Styles on the Way!

Play with MMGEN-FaceStylor

If you have followed the aforementioned steps, we can start to investigate FaceStylor!

Quick Try

To quickly try our project, please run the command below

python demo/quick_try.py demo/src.png --style toonify

Then, you can check the result in work_dirs/demos/agile_result.png.

  • If you want to play with your own photos, you can replace demo/src.png with your photo.
  • If you want to switch to another style, change toonify with other styles. Now, supported styles include toonify, oil, sketch, bitmoji, cartoon, comic.

Inversion

The inversion task will adopt a source image as input and return the most similar image that can be generated by the generator model.

For inversion, you can directly use agilegan_demo like this

python demo/agilegan_demo.py SOURCE_PATH CONFIG [--ckpt CKPT] [--device DEVICE] [--save-path SAVE_PATH]

Here, you should set SOURCE_PATH to your image path, CONFIG to the config file path, and CKPT to checkpoint path.

Take Celebahq-Encoder as an example, you need to download the weights to work_dirs/pre-trained/agile_encoder_celebahq1024x1024_lr_1e-4_150k.pth, put your test image under data run

python demo/agilegan_demo.py demo/src.png configs/agilegan/agile_encoder_celebahq1024x1024_lr_1e-4_150k.py --ckpt work_dirs/pre-trained/agile_encoder_celebahq_lr_1e-4_150k.pth

You will find the result work_dirs/demos/agile_result.png.

Stylization

Since the encoder and decoder of stylization can be trained from different configs, you're supposed to set their ckpts' path in config file. Take Metface-oil as an example, you can see the first two lines in config file.

encoder_ckpt_path = xxx
stylegan_weights = xxx

You should keep your actual weights path in line with your configs. Then run the same command without specifying CKPT.

python demo/agilegan_demo.py SOURCE_PATH CONFIG [--device DEVICE] [--save-path SAVE_PATH]

Train

Here I will tell you how to fine-tune with your own datasets. With only 100-200 images and less than one hour, you can train your own StyleGAN2. The only thing you need to do is to copy an agile_transfer config, like this one. Then modify the imgs_root with your actual data root, choose one of the two commands below to train your own model.

# For distributed training
bash tools/dist_train.sh ${CONFIG_FILE} ${GPUS_NUMBER} \
    --work-dir ./work_dirs/experiments/experiments_name \
    [optional arguments]
# For slurm training
bash tools/slurm_train.sh ${PARTITION} ${JOB_NAME} ${CONFIG} ${WORK_DIR} \
    [optional arguments]

Training Details

In this part, I will explain some training details, including ADA setting, layer freeze, and losses.

ADA Setting

To use ADA in your discriminator, you can use ADAStyleGAN2Discriminator as your discriminator, and adjust ADAAug setting as follows:

model = dict(
    discriminator=dict(
                 type='ADAStyleGAN2Discriminator',
                 data_aug=dict(type='ADAAug',
                 aug_pipeline=aug_kwargs, # This and below arguments can be set by yourself.
                 update_interval=4,
                 augment_initial_p=0.,
                 ada_target=0.6,
                 ada_kimg=500,
                 use_slow_aug=False)))

Layer Freeze Setting

FreezeD can be used for small data fine-tuning.

FreezeG can be used for pseudo translation.

model = dict(
  freezeD=5, # set to -1 if not need
  freezeG=4 # set to -1 if not need
  )

Losses Setting

In AgileGAN, to preserve the recognizable identity of the generated image, they introduce a similarity loss at the perceptual level. You can adjust the lpips_lambda as follows:

model = dict(lpips_lambda=0.8)

Generally speaking, the larger lpips_lambda is, the better the recognizable identity can be kept.

Datasets Link

To make it easier for you to train your own models, here are some links to publicly available datasets.

Dataset Links
MetFaces
AFHQ
Toonify
photo2cartoon
selfie2anime
face2comics v2
High-Resolution Anime Face
Bitmoji

Applications

We also provide LayerSwap and DNI apps for the trade-off between the structure of the original image and the stylization degree. To this end, you can adjust some parameters to get your desired result.

LayerSwap

When Layer Swapping is applied, the generated images have a higher similarity to the source image than AgileGAN's results.

From Left to Right: Input, Layer-Swap with L = 4, 3, 2, xxx Output

Run this command line to perform layer swapping:

python apps/layerSwap.py source_path modelA modelB \
      [--swap-layer SWAP_LAYER] [--device DEVICE] [--save-path SAVE_PATH]

Here, modelA is set to an PSPEncoderDecoder(config starts with agile_encoder) with FFHQ-StyleGAN2 as the decoder, modelB is set to an PSPEncoderDecoder(config starts with agile_encoder) with desired style generator as the decoder. Generally, the deeper you set swap-layer, the better structure of the original image will be kept.

We also provide a blending script to create and save the mixed weights.

python modelA modelB [--swap-layer SWAP_LAYER] [--show-input SHOW_INPUT] [--device DEVICE] [--save-path SAVE_PATH]

Here, modelA is the base model, where only the deep layers of its decoder will be replaced with modelB's counterpart.

DNI

Deep Network Interpolation between L4 and AgileGAN output

For more precise stylization control, you can try DNI with following commands:

python apps/dni.py source_path modelA modelB [--intervals INTERVALS] [--device DEVICE] [--save-folder SAVE_FOLDER]

Here, modelA and modelB are supposed to be PSPEncoderDecoder(configs start with agile_encoder) with decoders of different stylization degrees. INTERVALS is supposed to be the interpolation numbers.

You can also try applications in MMGEN, like interpolation and SeFA.

Interpolation


Indeed, we have provided an application script to users. You can use apps/interpolate_sample.py with the following commands for unconditional models’ interpolation:

python apps/interpolate_sample.py \
    ${CONFIG_FILE} \
    ${CHECKPOINT} \
    [--show-mode ${SHOW_MODE}] \
    [--endpoint ${ENDPOINT}] \
    [--interval ${INTERVAL}] \
    [--space ${SPACE}] \
    [--samples-path ${SAMPLES_PATH}] \
    [--batch-size ${BATCH_SIZE}] \

For more details, you can read related Docs.

Galary

Toonify


Oil


Cartoon


Comic


Bitmoji


Notions and TODOs

  • For encoder, I experimented with vae-encoder but found no significant improvement for inversion. I follow the "encoding into z plus space" way as the author does. I will release the vae-encoder version later, but I only offer a vanilla encoder this time.
  • For generator, I released vanilla stylegan2-generator, and attribute-aware generator will be released in next version.
  • For training settings, the parameters have slight difference from the paper. And I also tried ADA, freezeD and other methods not mentioned in paper.
  • More styles will be available in the next version.
  • More applications will be available in the next version.
  • We are also considering a web-side application.
  • Further code clean jobs.

Acknowledgments

Codes reference:

Display photos from: https://unsplash.com/t/people

Web demo powered by: https://gradio.app/

License

This project is released under the Apache 2.0 license. Some implementation in MMGEN-FaceStylor are with other licenses instead of Apache2.0. Please refer to LICENSES.md for the careful check, if you are using our code for commercial matters.

Comments
  • errors with onnx conversion

    errors with onnx conversion

    hi, i met with a problem when trying to convert encoder to onnx for deploy. errors pop as follow: torch.onnx.symbolic_registry.UnsupportedOperatorError: Exporting the operator prim::layout to ONNX opset version 16 is not supported. Please feel free to request support or submit a pull request on PyTorch GitHub.

    after a careful debug, i cannot locate the exact usage of torch::Layout.

    thanks!

    opened by psy2013GitHub 0
  • Fail to import ``MultiScaleDeformableAttention`` from ``mmcv.ops.multi_ scale_ deform_ attn``,You should install ``mmcv-full`` if you need this module.

    Fail to import ``MultiScaleDeformableAttention`` from ``mmcv.ops.multi_ scale_ deform_ attn``,You should install ``mmcv-full`` if you need this module.

    I follow the step-by-step instructions of your article to repeatedly install and uninstall in the Windows 10 environment: Anaconda3、cuda10.1、python-3.8.5、 pytorch1.7.1、mmcv-full1.4.2,

    However, when running the command: python demo/quick_ Try.py demo/src.png -- style toy is always stuck in an error:

    Fail to import MultiScaleDeformableAttention from mmcv.ops.multi_ scale_ deform_ attn, You should install mmcv-full if you need this module.

    In addition, I have installed mmcv according to your article guidance, also according to Baidu method, and downloaded whl (Windows version) directly on the official website and then installed it with instructions, However, the problem remains. How can I solve this problem? thank you.

    Here are the instructions I often use:

    conda create -n facestylor python=3.8.5 -y conda activate facestylor conda install pytorch=1.7.1 cudatoolkit=10.1 torchvision -c pytorch

    pip install mmcv-full==1.4.2 -f https://download.openmmlab.com/mmcv/dist/cu{Cuda_verison}/torch{Pytorch_Version}/index.html

    pip install mmcv-full==1.4.2 -f https://download.openmmlab.com/mmcv/dist/cu101/torch1.7.1/index.html

    git clone https://github.com/open-mmlab/mmgeneration.git cd mmgeneration

    pip install -r requirements.txt pip install -v -e .
    cd ..

    运行:H:\Program Files\MMGEN-FaceStylor python demo/quick_try.py demo/src.png --style toonify

    遇到问题: 1、No module named 'cv2' pip install opencv-contrib-python

    2、You should install mmcv-full if you need this module pip install -U openmim mim install mmcv-full

    opened by biglee2022 0
  • Installation error

    Installation error

    File "/data/miniconda3/envs/facestylor/lib/python3.7/site-packages/mmcls/init.py", line 57, in f'MMCV=={mmcv.version} is used but incompatible. '
    AssertionError: MMCV==1.3.15 is used but incompatible. Please install mmcv>=1.4.2, <=1.9.0.

    opened by laolongboy 0
  • Tips for training

    Tips for training

    Thank you for making this repository.

    It might be hard to run custom trainning due to some issues in the repo. Here are tips to make it work:

    Env: RTX 3080, Ubuntu 18.04, Python 3.8, Pytorch 1.7.0, CUDA 11, CUDAToolkit 11.0.221, mmvc(torch1.7.0 and cu110), mmgeneration(f6551e1)

    1. Issue related to mmgeneration SiLU is registered

    Comment line 35(the annotation to register SiLU) in mmgeneration/mmgen/models/architectures/ddpm/modules.py, then install mmgeneration.

    2. Build error when compiling custom operators nvcc fatal : Unsupported gpu architecture ‘compute_86‘ on new graphics card series.

    Use export TORCH_CUDA_ARCH_LIST="8.0" before running.

    3. Pretrained weights is missing.

    Download pretrained weights in configs into work_dirs/pre-trained/ before running.

    4. Running trainer directly with Python.

    Add agilegan folder in tools/train.py,

    import sys
    sys.path.append(PATH_TO_MMGEN-FaceStylor)
    import agilegan  # isort:skip  # noqa
    

    then use python tools/train.py PATH_TO_YOUR_CONFIGS --work-dir PATH_TO_YOUR_DIR --gpus GPU_NUMS.

    5. object has no attribute 'module' in transfer.py and log_buffer boardcasting error

    Fix agilegan/transfer.py with, ~line 140 and 210

    # obtain some params
            # fix
            # g_log_size = self.generator.module.log_size
            g_log_size = self.generator.log_size
            # fix
            # if hasattr(self.generator.module, 'num_layers'):
            if hasattr(self.generator, 'num_layers'):
                # fix
                # g_num_layers = self.generator.module.num_layers
                g_num_layers = self.generator.num_layers
            else:
                # fix
                # g_num_layers = self.generator.module.num_injected_noises
                g_num_layers = self.generator.num_injected_noises
            # fix
            # d_log_size = self.discriminator.module.log_size
            d_log_size = self.discriminator.log_size
    

    ~line 460

    # update ada p
            # fix
            # if hasattr(self.discriminator.module,
            #            'with_ada') and self.discriminator.module.with_ada:
            if hasattr(self.discriminator,
                       'with_ada') and self.discriminator.with_ada:
                # self.discriminator.module.ada_aug.log_buffer[0] += 1
                self.discriminator.ada_aug.log_buffer[0] += 1
                # self.discriminator.module.ada_aug.log_buffer[
                self.discriminator.ada_aug.log_buffer[
                # fix
                #    1] += disc_pred_real.sign()
                   1] += disc_pred_real.sign().sum()
                # self.discriminator.module.ada_aug.update(iteration=curr_iter,
                self.discriminator.ada_aug.update(iteration=curr_iter,
                                                         num_batches=batch_size)
                log_vars_disc['ada_prob'] = (
                    # self.discriminator.module.ada_aug.aug_pipeline.p.data)
                    self.discriminator.ada_aug.aug_pipeline.p.data)


    6. Issue related to logger, gpu data should use cpu() before numpy().

    Disable logger in your config, you can get info in work directory.

    # log_config = dict(interval=100, hooks=[dict(type='TextLoggerHook')])
    log_config = dict(interval=100, hooks=[])
    

    Hopes this helps.

    opened by hepezu 3
  • error

    error

    Hi, I try to train a new encoder but it has some errors: AttributeError: 'SwapStyleGANv2Generator' object has no attribute 'module'. How to solve like this? @plyfager @TommyZihao image

    opened by flynnamy 0
  • Train VaeEncoderDocder issues

    Train VaeEncoderDocder issues

    We attempt to train a new encoder, but it's shown this errors as follow.

    Traceback (most recent call last): File "tools/train_encoder.py", line 161, in main() File "tools/train_encoder.py", line 138, in main test_cfg=cfg.test_cfg) File "/root/picasso/haoyuan_chen/chy/mmgeneration/mmgen/models/builder.py", line 32, in build_model return build(cfg, MODELS, dict(train_cfg=train_cfg, test_cfg=test_cfg)) File "/root/picasso/haoyuan_chen/chy/mmgeneration/mmgen/models/builder.py", line 27, in build return build_from_cfg(cfg, registry, default_args) File "/root/picasso/haoyuan_chen/anaconda3/envs/facestylor/lib/python3.7/site-packages/mmcv/utils/registry.py", line 45, in build_from_cfg f'{obj_type} is not in the {registry.name} registry') KeyError: 'PSPEncoderDecoder is not in the model registry'

    And we refer to the methods on the forum, such as reconfiguring the requirements.txt and using @models register_ module(name='PSPEncoderDecoder', force=True), but they are useless.

    We now suspect that it is caused by the mismatch between the version of mmcv and the version of mmgen. Our version of mmcv is 1.4.8 and the version of mmgen is 0.6.0.

    opened by duckcheng 0
Owner
OpenMMLab
OpenMMLab
Official pytorch implementation of "Feature Stylization and Domain-aware Contrastive Loss for Domain Generalization" ACMMM 2021 (Oral)

Feature Stylization and Domain-aware Contrastive Loss for Domain Generalization This is an official implementation of "Feature Stylization and Domain-

null 22 Sep 22, 2022
A few stylization coreML models that I've trained with CreateML

CoreML-StyleTransfer A few stylization coreML models that I've trained with CreateML You can open and use the .mlmodel files in the "models" folder in

Doron Adler 8 Aug 18, 2022
Realtime Face Anti Spoofing with Face Detector based on Deep Learning using Tensorflow/Keras and OpenCV

Realtime Face Anti-Spoofing Detection ?? Realtime Face Anti Spoofing Detection with Face Detector to detect real and fake faces Please star this repo

Prem Kumar 86 Aug 3, 2022
AI Face Mesh: This is a simple face mesh detection program based on Artificial intelligence.

AI Face Mesh: This is a simple face mesh detection program based on Artificial Intelligence which made with Python. It's able to detect 468 different

Md. Rakibul Islam 1 Jan 13, 2022
img2pose: Face Alignment and Detection via 6DoF, Face Pose Estimation

img2pose: Face Alignment and Detection via 6DoF, Face Pose Estimation Figure 1: We estimate the 6DoF rigid transformation of a 3D face (rendered in si

Vítor Albiero 519 Dec 29, 2022
Code for HLA-Face: Joint High-Low Adaptation for Low Light Face Detection (CVPR21)

HLA-Face: Joint High-Low Adaptation for Low Light Face Detection The official PyTorch implementation for HLA-Face: Joint High-Low Adaptation for Low L

Wenjing Wang 77 Dec 8, 2022
DVG-Face: Dual Variational Generation for Heterogeneous Face Recognition, TPAMI 2021

DVG-Face: Dual Variational Generation for HFR This repo is a PyTorch implementation of DVG-Face: Dual Variational Generation for Heterogeneous Face Re

null 52 Dec 30, 2022
[TIP 2021] SADRNet: Self-Aligned Dual Face Regression Networks for Robust 3D Dense Face Alignment and Reconstruction

SADRNet Paper link: SADRNet: Self-Aligned Dual Face Regression Networks for Robust 3D Dense Face Alignment and Reconstruction Requirements python

Multimedia Computing Group, Nanjing University 99 Dec 30, 2022
Swapping face using Face Mesh with TensorFlow Lite

Swapping face using Face Mesh with TensorFlow Lite

iwatake 17 Apr 26, 2022
Face Synthetics dataset is a collection of diverse synthetic face images with ground truth labels.

The Face Synthetics dataset Face Synthetics dataset is a collection of diverse synthetic face images with ground truth labels. It was introduced in ou

Microsoft 608 Jan 2, 2023
Face Library is an open source package for accurate and real-time face detection and recognition

Face Library Face Library is an open source package for accurate and real-time face detection and recognition. The package is built over OpenCV and us

null 52 Nov 9, 2022
VGGFace2-HQ - A high resolution face dataset for face editing purpose

The first open source high resolution dataset for face swapping!!! A high resolution version of VGGFace2 for academic face editing purpose

Naiyuan Liu 232 Dec 29, 2022
A large-scale face dataset for face parsing, recognition, generation and editing.

CelebAMask-HQ [Paper] [Demo] CelebAMask-HQ is a large-scale face image dataset that has 30,000 high-resolution face images selected from the CelebA da

switchnorm 1.7k Dec 26, 2022
Python tools for 3D face: 3DMM, Mesh processing(transform, camera, light, render), 3D face representations.

face3d: Python tools for processing 3D face Introduction This project implements some basic functions related to 3D faces. You can use this to process

Yao Feng 2.3k Dec 30, 2022
Face-Recognition-Attendence-System - This face recognition Attendence system using Python

Face-Recognition-Attendence-System I have developed this face recognition Attend

Riya Gupta 4 May 10, 2022
Video-face-extractor - Video face extractor with Python

Python face extractor Setup Create the srcvideos and faces directories Put your

null 2 Feb 3, 2022
Face and Pose detector that emits MQTT events when a face or human body is detected and not detected.

Face Detect MQTT Face or Pose detector that emits MQTT events when a face or human body is detected and not detected. I built this as an alternative t

Jacob Morris 38 Oct 21, 2022
Microsoft Cognitive Toolkit (CNTK), an open source deep-learning toolkit

CNTK Chat Windows build status Linux build status The Microsoft Cognitive Toolkit (https://cntk.ai) is a unified deep learning toolkit that describes

Microsoft 17.3k Dec 29, 2022
Microsoft Cognitive Toolkit (CNTK), an open source deep-learning toolkit

CNTK Chat Windows build status Linux build status The Microsoft Cognitive Toolkit (https://cntk.ai) is a unified deep learning toolkit that describes

Microsoft 17k Feb 11, 2021