Quickly and easily create / train a custom DeepDream model

Overview

Dream-Creator

This project aims to simplify the process of creating a custom DeepDream model by using pretrained GoogleNet models and custom image datasets.

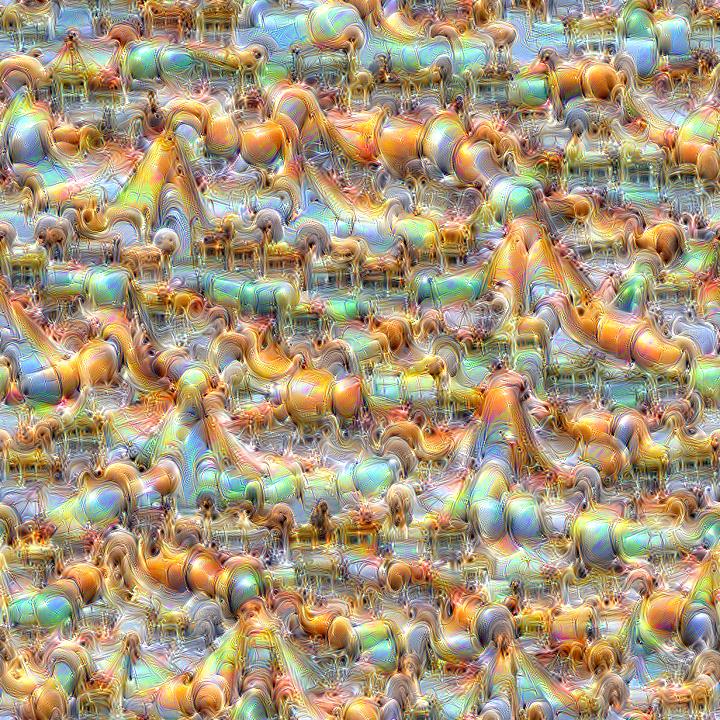
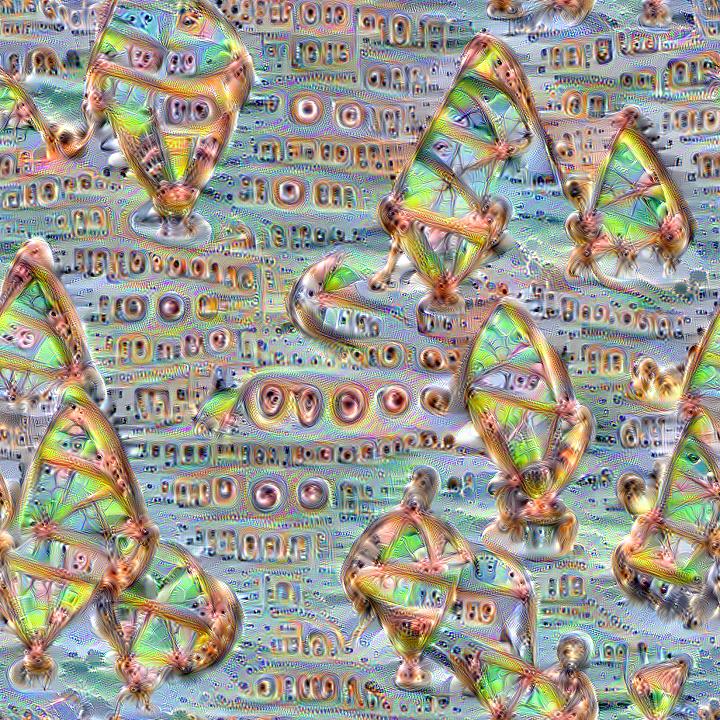
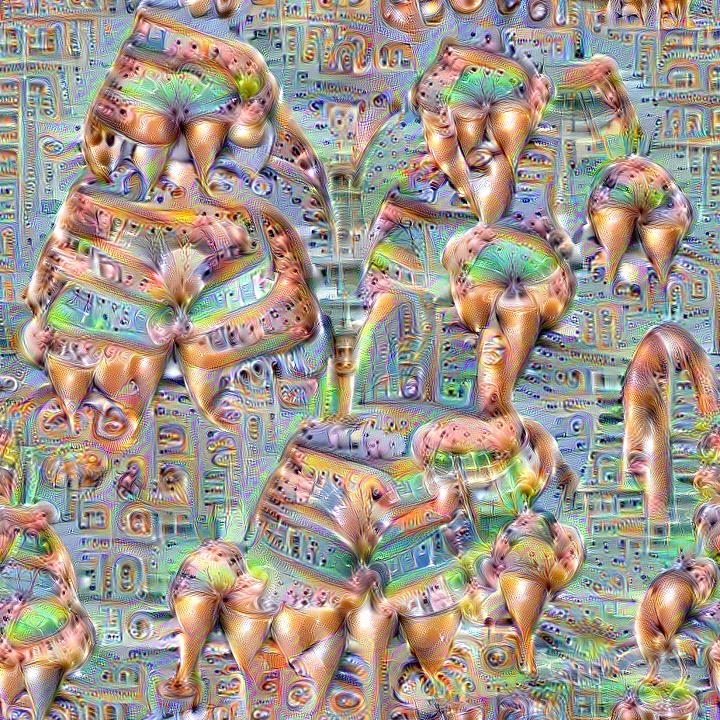
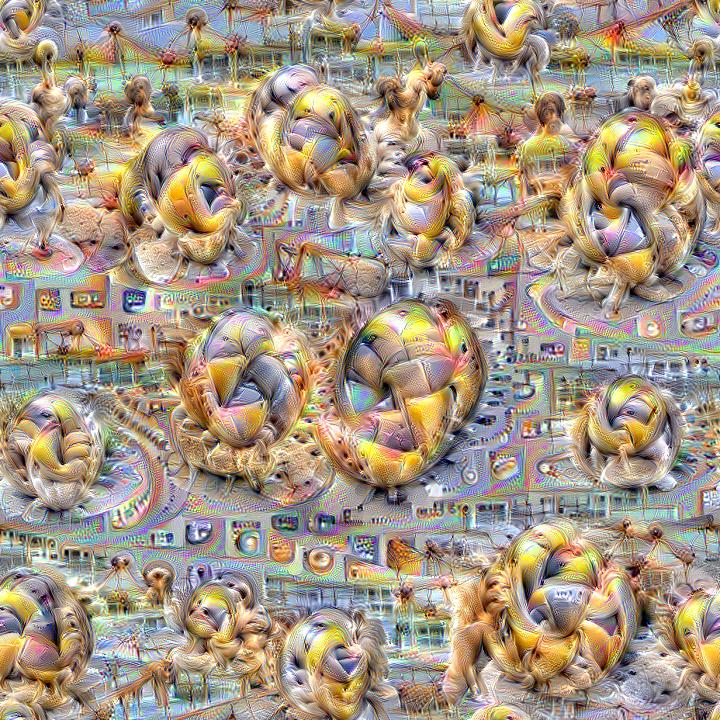
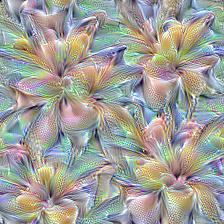
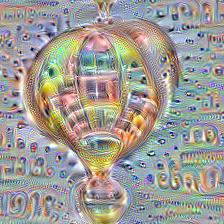
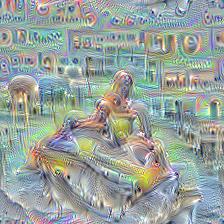
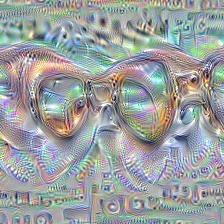
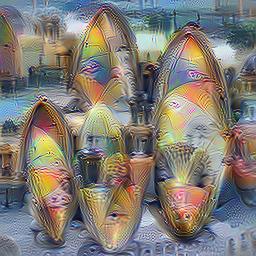
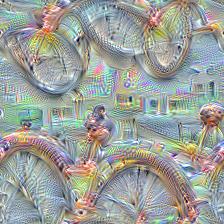
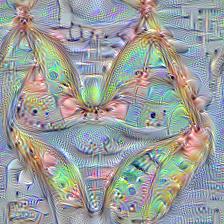
Here are some example visualizations created with custom DeepDream models trained on summer themed images:


Setup:

Dependencies:

You can find detailed installation instructions for Ubuntu and Windows in the installation guide.

After making sure that PyTorch is installed, you can optionally download the Places365 GoogleNet and Inception5h (InceptionV1) pretrained models with the following command:

python models/download_models.py

If you just want to create DeepDreams with the pretrained models or you downloaded a pretrained model made by someone else with Dream-Creator, then you can skip ahead to visualizing models.

Getting Started

  1. Create & Prepare Your Dataset

    1. Collect Images

    2. Sort images into the required format.

    3. Remove any corrupt images.

    4. Ensure that any duplicates are removed if you have not done so already

    5. Resize the dataset to speed up training.

    6. Calculate the mean and standard deviation of your dataset.

  2. Train a GoogleNet model

  3. Visualize the results

  4. If the results are not great, then you may have to go back to step 1-2 and make some changes with what images, categories, and training parameters are used.

It can take as little as 5 epochs to create visualizations that resemble your training data using the main FC/Logits layer. In order to speed up training and create better looking results, the pretrained BVLC model used is partially frozen in order to protect the lower layers from changing.


Dataset Creation

In order to train a custom DeepDream model, you will need to create a dataset composed of images that you wish to use for training. There are a variety of ways that you can aquire images for your dataset, and you will need at least a couple hundred images for each category/class.

DeepDream is most often performed with image classification models trained on image datasets that are composed of different categories/classes. Image classification models attempt to learn the difference between different image classes and in doing so the neurons gain the ability to create dream-like hallucinations. The images you choose, the differences between them, the differences between your chosen classes, and the number of images used will greatly affect the visualizations that can be produced.

PyTorch image datasets are to be structured where the main directory/folder contains subfolders/directories for each category/class. Below an example of the required dataset structure is shown:

dataset_dir
│
└───category1
│   │   image1.jpg
│   │   image2.jpg
│   │   image3.jpg
│
└───category2
    │   image1.jpg
    │   image2.jpg
    │   image3.jpg

Once you have created your dataset in the proper format, make sure that you remove any duplicate images if you have not done so already. There are a variety of tools that you can use for this task, including free and open source software.

If you have not done so already, you may wish to create a backup copy of your dataset.

Next you will need to verify that none of the images are corrupt in such a way that prevents PyTorch from loading them. To automatically remove any corrupt images from your dataset, use the following command:

python data_tools/remove_bad.py -delete_bad -data_path <training_data>

Next you will likely want to resize your dataset to be closer to the training image size in order to speed up training. Resizing your dataset will not prevent you from creating larger DeepDream images with the resulting model. The included resizing script will only modify images that go above the specified image size with their height or width.

To resize the images in your dataset, use the following command:

python data_tools/resize_data.py -data_path <training_data> -max_size 500

Now with your newly resized dataset, you can calculate the mean and standard deviation of your dataset for use in training, and DeepDreaming. Make sure to recalculate the mean and standard deviation again if you modify the dataset by adding or removing images.

To calculate the mean and standard deviation of your dataset, use the following command and save the output for the next step:

python data_tools/calc_ms.py -data_path <training_data>

Now you can start training your DeepDream model by running the GoogleNet training script. It's recommended that you save the model every 5-10 epochs in order to monitor the quality of the visualizations.

After training your models, you can add a color correlation matrix to them for color decorrelation with the following command:

python data_tools/calc_cm.py -data_path <training_data> -model_file <bvlc_out120>.pth

GoogleNet Training

Basic training command:

python train_googlenet.py -data_path <training_data> -balance_classes -batch_size 96 -data_mean <mean> -data_sd <sd>

Input options:

  • -data_path: Path to the dataset directory/folder that you wish to use.
  • -data_mean: Your precalculated list of mean values for your chosen dataset.
  • -data_sd: Your precalculated list of standard deviation values for your chosen dataset.

Training options:

  • -num_epochs: The number of training epochs to use. Default is 120.
  • -batch_size: The number of training and validation images to put through the network at the same time. Default is 32.
  • -learning_rate: Learning rate to use with the ADAM or SGD optimizer. Default is 1e-2.
  • -optimizer: The optimization algorithm to use; either sgd or adam; default is sgd.
  • -train_workers: How many workers to use for training. Default is 0.
  • -val_workers: How many workers to use for validation. Default is 0.
  • -balance_classes: Enabling this flag will balance training for each class based on class size.

Model options:

  • -model_file: Path to the .pth model file to use for the starting model. Default is the BVLC GoogleNet model.
  • -freeze_to: Which layer to freeze the model up to; one of none, conv1, conv2, conv3, mixed3a, mixed3b, mixed4a, mixed4b, mixed4c, mixed4d, mixed4e, mixed5a, or mixed5b. Default is mixed3b.
  • -freeze_aux1_to: Which layer to freeze the first auxiliary branch up to; one of none, loss_conv, loss_fc, or loss_classifier. Default is none.
  • -freeze_aux2_to: Which layer to freeze the second auxiliary branch up to; one of none, loss_conv, loss_fc, or loss_classifier. Default is none.
  • -delete_branches: If this flag is enabled, no auxiliary branches will be used in the model.

Output options:

  • -save_epoch: Save the model every save_epoch epochs. Default is 10. Set to 0 to disable saving intermediate models.
  • -output_name: Name of the output model. Default is bvlc_out.pth.
  • -individual_acc: Enabling this flag will print the individual accuracy of each class.
  • -save_csv: Enabling this flag will save loss and accuracy data to txt files.
  • -csv_dir: Where to save csv files. Default is set to current working directory.

Other options:

  • -use_device: Zero-indexed ID of the GPU to use plus cuda:. Default is cuda:0.
  • -seed: An integer value that you can specify for repeatable results. By default this value is random for each run.

Dataset options:

  • -val_percent: The percentage of images from each class to use for validation. Default is 0.2.

Visualizing Results

Visualizing GoogleNet FC Layer Results

After training a new DeepDream model, you'll need to test it's visualizations. The best visualizations are found in the main FC layer also known as the 'logits' layer. This script helps you quickly and easily visualize all of a specified layer's channels in a particular model for a particular model epoch, by generating a separate image for each channel.

Input options:

  • -model_file: Path to the pretrained GoogleNet model that you wish to use.
  • -learning_rate: Learning rate to use with the ADAM or L-BFGS optimizer. Default is 1.5.
  • -optimizer: The optimization algorithm to use; either lbfgs or adam; default is adam.
  • -num_iterations: Default is 500.
  • -layer: The specific layer you wish to use. Default is set to fc.
  • -extract_neuron: If this flag is enabled, the center neuron will be extracted from each channel.
  • -image_size: A comma separated list of <height>,<width> to use for the output image. Default is set to 224,224.
  • -jitter: The amount of image jitter to use for preprocessing. Default is 16.
  • -fft_decorrelation: Whether or not to use FFT spatial decorrelation. If enabled, a lower learning rate should be used.
  • -color_decorrelation: Whether or not to use color decorrelation. Optionally provide a comma separated list of values for the color correlation matrix. If no values are provided, an attempt to load a color correlation matrix from the model file will be made before defaulting to the ImageNet color correlation matrix.
  • -random_scale: Whether or not to use random scaling. Optionally provide a comma separated list of values for scales to be randomly selected from. If no values are provided, then scales will be randomly selected from the following list: 1, 0.975, 1.025, 0.95, 1.05.
  • -random_rotation: Whether or not to use random rotations. Optionally provide a comma separated list of degree values for rotations to be randomly selected from or a single value to use for randomly selecting degrees from [-value, value]. If no values are provided, then a range of [-5, 5] wil be used.
  • -padding: The amount of padding to use before random scaling and random rotations to prevent edge artifacts. The padding is then removed after the transforms. Default is set to 0 to disable it.

Processing options:

  • -batch_size: How many channel visualization images to create in each batch. Default is 10.
  • -start_channel: What channel to start creating visualization images at. Default is 0.
  • -end_channel: What channel to stop creating visualization images at. Default is set to -1 for all channels.

Only Required If Model Doesn't Contain Them, Options:

  • -model_epoch: The training epoch that the model was saved from, to use for the output image names. Default is 120.
  • -data_mean: Your precalculated list of mean values that was used to train the model, if they weren't saved inside the model.
  • -num_classes: The number of classes that the model was trained on. Default is 120.

Output options:

  • -output_dir: Where to save output images. Default is set to the current working directory.
  • -print_iter: Print progress every print_iter iterations. Set to 0 to disable printing.
  • -save_iter: Save the images every save_iter iterations. Default is to 0 to disable saving intermediate results.

Other options:

  • -use_device: Zero-indexed ID of the GPU to use plus cuda:. Default is cuda:0.
  • -seed: An integer value that you can specify for repeatable results. By default this value is random for each run.

Basic FC (logits) layer visualization:

python vis_multi.py -model_file <bvlc_out120>.pth

Advanced FC (logits) layer visualization:

python vis_multi.py -model_file <bvlc_out120>.pth -layer fc -color_decorrelation -fft_decorrelation -random_scale -random_rotation -lr 0.4 -output_dir <output_dir> -padding 16 -jitter 16,8

Performing DeepDream With Your Newly Trained Model

This script lets you create DeepDream hallucinations with trained GoogleNet models.

Input options:

  • -model_file: Path to the pretrained GoogleNet model that you wish to use.
  • -learning_rate: Learning rate to use with the ADAM or L-BFGS optimizer. Default is 1.5.
  • -optimizer: The optimization algorithm to use; either lbfgs or adam; default is adam.
  • -num_iterations: Default is 500.
  • -content_image: Path to your input image. If no input image is specified, random noise is used instead.
  • -layer: The specific layer you wish to use. Default is set to mixed5a.
  • -channel: The specific layer channel you wish to use. Default is set to -1 to disable specific channel selection.
  • -extract_neuron: If this flag is enabled, the center neuron will be extracted from the channel selected by the -channel parameter.
  • -image_size: A comma separated list of <height>,<width> to use for the output image. If a single value for maximum side length is provided along with a content image, then the minimum side length will be calculated automatically. Default is set to 224,224.
  • -jitter: The amount of image jitter to use for preprocessing. Default is 16.
  • -fft_decorrelation: Whether or not to use FFT spatial decorrelation. If enabled, a lower learning rate should be used.
  • -color_decorrelation: Whether or not to use color decorrelation. Optionally provide a comma separated list of values for the color correlation matrix. If no values are provided, an attempt to load a color correlation matrix from the model file will be made before defaulting to the ImageNet color correlation matrix.
  • -random_scale: Whether or not to use random scaling. Optionally provide a comma separated list of values for scales to be randomly selected from. If no values are provided, then scales will be randomly selected from the following list: 1, 0.975, 1.025, 0.95, 1.05.
  • -random_rotation: Whether or not to use random rotations. Optionally provide a comma separated list of degree values for rotations to be randomly selected from or a single value to use for randomly selecting degrees from [-value, value]. If no values are provided, then a range of [-5, 5] wil be used.
  • -padding: The amount of padding to use before random scaling and random rotations to prevent edge artifacts. The padding is then removed after the transforms. Default is set to 0 to disable it.
  • -layer_vis: Whether to use DeepDream or direction visualization when not visualizing specific layer channels. One of deepdream or direction; default is deepdream.

Only Required If Model Doesn't Contain Them, Options:

  • -data_mean: Your precalculated list of mean values that was used to train the model, if they weren't saved inside the model.
  • -num_classes: The number of classes that the model was trained on, if it wasn't saved inside the model.

Output options:

  • -output_image: Name of the output image. Default is out.png.
  • -print_iter: Print progress every print_iter iterations. Set to 0 to disable printing.
  • -save_iter: Save the images every save_iter iterations. Default is to 0 to disable saving intermediate results.

Tiling options:

  • -tile_size: The desired tile size to use. Either a comma separated list of <height>,<width> or a single value to use for both tile height and width. Default is set to 0 to disable tiling.
  • -tile_overlap: The percentage of overlap to use for the tiles. Default is 25 for 25% overlap. Overlap percentages over 50% will result in problems.
  • -tile_iter: Default is 50.

Other options:

  • -use_device: Zero-indexed ID of the GPU to use plus cuda:. Default is cuda:0.
  • -seed: An integer value that you can specify for repeatable results. By default this value is random for each run.

Basic DeepDream:

python vis.py -model_file <bvlc_out120>.pth -layer mixed5a

Advanced DeepDream:

python vis.py -model_file <bvlc_out120>.pth -layer mixed5a/conv_5x5_relu -channel 9 -color_decorrelation -fft_decorrelation -random_scale -random_rotation -lr 0.4 -padding 16 -jitter 16,8

Dataset Cleaning + Building & Visualization Tools

See here for more information on all the included scripts/tools relating to dataset creation, cleaning, and preparation.
Comments
  • Visualization fails when using custom image

    Visualization fails when using custom image

    Hello,

    Thank you for the great and easy to use repository. I was trying to train a custom deep dream module and then trying to run it on a custom image. While the system works flawlessly on random input (no -content_image), it fails when I try to set a custom content_img.

    The specific error I get is on (utils/decorrelation.py):

    ....
    def ifft_image(self, input):
         input = input * self.scale
    ....
    

    The error is a shape mismatch. My input image is 224x224 and the scale variable is 224x113 on the spatial dimension.

    I tried looking at the code and it seems the line (utils/decorrelation.py):

    fx = self.pytorch_fftfreq(self.w)[: self.w // 2 + wadd]

    returns the reduced spatial dimension. When the content image is not set, the script initializes a random input, which is incidentally 224x113, so there is no complain.

    Additionally, I also noticed that the random input tensor is initialized as torch.Size([1, 3, 224, 113, 2]). Which ends up with another error, when I do manage to patch the scale to be the same spatial dimension as the input. This is because my input (set by the -content_image) has the size torch.Size([1, 3, 224, 224]).

    So I was wondering if you have specific solution for this. And what is the 2 on the 5th dimension for the random input tensor.

    opened by Morpheus3000 8
  • getting an error while training GoogleNet on custom dataset

    getting an error while training GoogleNet on custom dataset

    Thanks for sharing your code. I ran your code on ellipse and rectangle and it worked but when I ran it on my own dataset ( Labeled Faced in the Wild-LFW) I get the below error: Total 7804 images, split into 1000 classes Classes: {'Aaron_Peirsol': 0, 'Abdoulaye_Wade': 1, 'Abdullah': 2, 'Abdullah_Gul': 3, 'Abdullah_al-Attiyah': 4, 'Abel_Pacheco': 5, 'Abid_Hamid_Mahmud_Al-Tikriti': 6, 'Adam_Sandler': 7,$ Traceback (most recent call last): File "dream-creator-master/train_googlenet.py", line 171, in main() File dream-creator-master/train_googlenet.py", line 51, in main main_func(params) File "dream-creator-master/train_googlenet.py", line 65, in main_func training_data, num_classes, class_weights = load_dataset(data_path=params.data_path, val_percent=params.val_percent, batch_size=params.batch_size,
    File "dream-creator-master/utils/training_utils.py", line 85, in load_dataset train_weights = [1 / train_class_counts[class_id] for class_id in range(num_classes)] File "dream-creator-master/utils/training_utils.py", line 85, in train_weights = [1 / train_class_counts[class_id] for class_id in range(num_classes)] KeyError: 169

    Do you have any idea how I can solve it, thanks.

    opened by mmitchef 2
  • Support for dream-creator models in neural-dream

    Support for dream-creator models in neural-dream

    I want to build my own models using Dream Creator and use them with neural-dream

    In the dream-creator-support branch you here: https://github.com/ProGamerGov/dream-creator/wiki/How-to-support-Dream-Creator-models-in-other-projects you say "Models only require the inceptionv1_caffe.py from the utils directory/folder and can be loaded like this:"

    Can you explain in more detail what this actually means? Do I use the inceptionv1_caffe.py from dream-creater? or do I edit the one in neural-dream. In short how do I use this? Thx! Mat

    opened by Bird-NZ 2
  • save_csv doesn't work

    save_csv doesn't work

    I am trying to save the accuracy for each class but it doesn't work. Do you have any idea how I can fix this.

    -save_csv: Enabling this flag will save loss and accuracy data to txt files.
    -csv_dir: Where to save csv files. Default is set to current working directory.
    

    inside of utils/train_model.py you have these lines of code

    def train_model(model, dataloaders, criterion, optimizer=None, lrscheduler=None, num_epochs=120, start_epoch=1, save_epoch=1, \
                    output_name='out.pth', device='cuda:0', has_branches=False, fc_only=False, num_classes=0, individual_acc = False, \
                    should_save_csv=False, csv_path='', save_info=None):
    
    opened by mmitchef 1
  • New features & bug fixes

    New features & bug fixes

    Bug Fixes:

    • Resolved confusion between BGR and RGB usage. Some custom models may need to be retrained.
    • Visualization scripts can now load all 3 starter models without errors.
    • The -seed parameter in the train_googlenet.py script should work more effectively now. Though this may not be the case if multiple training or validation workers are used.

    Changes:

    • The train_googlenet.py script now saves mean and standard deviation values in BGR format rather than RGB format.
    • The visualization scripts now expects mean and standard deviation values in BGR format rather than RGB format.
    • The calc_ms.py script now outputs normalization values in BGR format rather than RGB.
    • The vis_fc.py script has been replaced with vis_multi.py.

    New Features:

    • The new vis_multi.py script lets you visualize all channels in any specified layer, and lets you select a visualization batch size among other new features.
    • Added new tool to edit model file values, called edit_model.py.
    • Added new normalization value format attribute to models for easier handling of BGR and RGB models.
    • Added -use_rgb parameter to the calc_ms.py script for if you want the original behavior.

    To update your old models to the new correct format:

    python data_tools/edit_model.py -model_file <your-model.pth> -normval_format bgr -reverse_normvals -output_name <updated-model.pth>
    
    opened by ProGamerGov 1
  • AttributeError: module 'torch' has no attribute 'irfft'

    AttributeError: module 'torch' has no attribute 'irfft'

    if you are using torch 1.11.0 and getting this error "AttributeError: module 'torch' has no attribute 'irfft'"

    Solution: Replace all "torch.irfft" with "torch.fft.irfft"

    opened by mmitchef 0
  • Fix model class

    Fix model class

    I discovered that the Conv2d padding is different than torch.nn.functional padding, so I replaced all Conv2d padding with F.pad padding. I also discovered that the pooling layer in each InceptionModule was in the wrong spot.

    Bug fixes:

    • Replaced Conv2d padding with F.pad.
    • Fixed pool layer position in InceptionModule.
    opened by ProGamerGov 0
  • Transform improvements & DeepDream vs Direction clarification

    Transform improvements & DeepDream vs Direction clarification

    New Features:

    • The vis.py script now differentiates between direction visualization and DeepDream with the new -layer_vis parameter. The new parameter has two options, either deepdream or direction. The default is deepdream, and direction will result in the old behavior before this update. This parameter only works when no -channel value is specified.

    Improvements:

    • Improved random scaling based on the affine grid matrices that I learned about for: https://github.com/pytorch/captum/pull/500

    • Improvements to tensor normalization.

    • Center neuron extraction in the vis.py script now works for layer targets without specifying channels, though I'm not sure how useful this change will be.

    opened by ProGamerGov 0
  • Gigapixel image support & some error checking

    Gigapixel image support & some error checking

    Bug fixes:

    • The resize_data.py, find_bad.py, & vis.py scripts now support gigapixel images. Hopefully the Pillow/PIL DecompressionBombWarning warning no longer shows up. https://github.com/python-pillow/Pillow/issues/515, https://pillow.readthedocs.io/en/stable/reference/Image.html#PIL.Image.open You can manually change Image.MAX_IMAGE_PIXELS = 1000000000 to Image.MAX_IMAGE_PIXELS = None if you're still running into issues.

    • The vis.py script now checks that you specified the required number of image dimensions.

    Improvements:

    • General README improvements for color correlation matrices & color decorrelation.
    opened by ProGamerGov 0
  • Image size enhancements

    Image size enhancements

    Improvements:

    • When using a content image with the vis.py script, you can now only provide a single size dimension for the size of the largest dimension. Like before this update, if you provide two size values separated by a comma, then that exact specified size will be used.

    • The -tile_size parameter in the vis.py script now supports either a single value or two size values separated by a comma.

    opened by ProGamerGov 0
  • Fix tiling bug & improve README

    Fix tiling bug & improve README

    Improvements:

    • Added better surfboard example to README.

    Bug Fixes:

    • Resolved issue where if an edge tile overlap matched the regular overlap, then a blend mask mismatch would occur.
    opened by ProGamerGov 0
  • Values for color decorrelation

    Values for color decorrelation

    Hi! Again many thanks for this extensive implementation of the model.

    Could you document guidelines to decide on values for a color decorrelation matrix?

    I can not find guidelines on other deepdream fora.

    Hope you can shed some insight!

    opened by jossevessies 1
  • Cannot acces align_corners ... torch parameter

    Cannot acces align_corners ... torch parameter

    Hiya!

    Thank you for this amazing and super userfriendly git!

    I have one question... maybe it's more of a question, then an issue.

    I want to set the align_corners parameter of torch to True (it's default is set to false). To avoid some pixelated outcomes, as happens now cause i am making an upscaling animation deepdream with this material (which works pretty much to satisfaction btw!) I can not find the correct place in the codes to change align_corners.

    Have any idea maybe? I am using vis.py and vis_utils.py

    opened by jossevessies 0
  • KeyError: 667 when trying to save accuracy of each class

    KeyError: 667 when trying to save accuracy of each class

    I am trying to save accuracy of each class using the below script python train_googlenet.py -data_path CelebA -balance_classes -batch_size 64 -num_epochs 1000 -optimizer sgd -freeze_to conv1 -data_mean 92.1754,109.4887,143.2121 -data_sd 60.3302,63.6089,73.3 -save_epoch 50 -output_name bvlc_conv1/bvlc_out.pth -individual_acc -save_csv -csv_dir bvlc_conv1

    But, it gave me following error. Do you have any idea where this error is coming from? Thanks

    Total 30026 images, split into 1000 classes
    Classes:
     {'CA1': 0, 'CA10': 1, 'CA100': 2, 'CA1000': 3, 'CA1001': 4, 'CA101': 5, 'CA102': 6, 'CA103': 7, 'CA104': 8, 'CA105': 9, 'CA106': 10, 'CA107': 11, 'CA108': 12, 'CA109': 13, 'CA11': 14, 'CA110': 15, 'CA111': 16, 'CA112': 17, 'CA113': 18, 'CA114': 19, '$
    Model has 13,378,280 learnable parameters
    
    Epoch 1/1000
    ------------
    train Loss: 11.0882 Acc: 0.0009
      Class Acc: {0: 47.62, 1: 0.0, 2: 0.0, 3: 0.0, 4: 0.0, 5: 0.0, 6: 0.0, 7: 0.0, 8: 0.0, 9: 0.0, 10: 0.0, 11: 0.0, 12: 0.0, 13: 0.0, 14: 0.0, 15: 0.0, 16: 0.0, 17: 0.0, 18: 0.0, 19: 0.0, 20: 0.0, 21: 0.0, 22: 0.0, 23: 0.0, 24: 0.0, 25: 0.0, 26: 0.0, 27$
      Time Elapsed 1m 45s
    Traceback (most recent call last):
      File "./dream-creator-master/train_googlenet.py", line 171, in <module>
        main()
      File "./dream-creator-master/train_googlenet.py", line 51, in main
        main_func(params)
      File "./dream-creator-master/train_googlenet.py", line 163, in main_func
        train_model(model=cnn, dataloaders=training_data, criterion=criterion, optimizer=optimizer, lrscheduler=lrscheduler, \
      File "./dream-creator-master/utils/train_model.py", line 72, in train_model
        class_acc[c_val] = (class_acc[c_val].item() / data_counts[phase][c_val]) * 100
    KeyError: 667
    
    opened by mmitchef 0
  • Training a model without resulting in animal faces.

    Training a model without resulting in animal faces.

    I'm using "https://github.com/ProGamerGov/neural-dream/tree/dream-creator-support" to augment & warp images I have to create new interesting images.

    What I want to do is convey a mood into a photo. eg ie I have 1000 smiling faces (only 1 class) I want to train a model with just these faces and then use dream creator to apply this model to an image and start to see the mood "twist" into the photo.

    Issue: I keep getting residual animals coming through in my twisted images I apply my dream-creator model to. How can I train a model on ONLY my images and not take any pre trained data in?

    opened by Bird-NZ 5
Releases(v1.0.0)
Owner
null
Visual analysis and diagnostic tools to facilitate machine learning model selection.

Yellowbrick Visual analysis and diagnostic tools to facilitate machine learning model selection. What is Yellowbrick? Yellowbrick is a suite of visual

District Data Labs 3.9k Dec 30, 2022
Code for "High-Precision Model-Agnostic Explanations" paper

Anchor This repository has code for the paper High-Precision Model-Agnostic Explanations. An anchor explanation is a rule that sufficiently “anchors”

Marco Tulio Correia Ribeiro 735 Jan 5, 2023
A game theoretic approach to explain the output of any machine learning model.

SHAP (SHapley Additive exPlanations) is a game theoretic approach to explain the output of any machine learning model. It connects optimal credit allo

Scott Lundberg 18.3k Jan 8, 2023
L2X - Code for replicating the experiments in the paper Learning to Explain: An Information-Theoretic Perspective on Model Interpretation.

L2X Code for replicating the experiments in the paper Learning to Explain: An Information-Theoretic Perspective on Model Interpretation at ICML 2018,

Jianbo Chen 113 Sep 6, 2022
Python Library for Model Interpretation/Explanations

Skater Skater is a unified framework to enable Model Interpretation for all forms of model to help one build an Interpretable machine learning system

Oracle 1k Dec 27, 2022
Model analysis tools for TensorFlow

TensorFlow Model Analysis TensorFlow Model Analysis (TFMA) is a library for evaluating TensorFlow models. It allows users to evaluate their models on

null 1.2k Dec 26, 2022
Tool for visualizing attention in the Transformer model (BERT, GPT-2, Albert, XLNet, RoBERTa, CTRL, etc.)

Tool for visualizing attention in the Transformer model (BERT, GPT-2, Albert, XLNet, RoBERTa, CTRL, etc.)

Jesse Vig 4.7k Jan 1, 2023
JittorVis - Visual understanding of deep learning model.

JittorVis is a deep neural network computational graph visualization library based on Jittor.

null 182 Jan 6, 2023
Interpretability and explainability of data and machine learning models

AI Explainability 360 (v0.2.1) The AI Explainability 360 toolkit is an open-source library that supports interpretability and explainability of datase

null 1.2k Dec 29, 2022
Portal is the fastest way to load and visualize your deep neural networks on images and videos 🔮

Portal is the fastest way to load and visualize your deep neural networks on images and videos ??

Datature 243 Jan 5, 2023
Many Class Activation Map methods implemented in Pytorch for CNNs and Vision Transformers. Including Grad-CAM, Grad-CAM++, Score-CAM, Ablation-CAM and XGrad-CAM

Class Activation Map methods implemented in Pytorch pip install grad-cam ⭐ Comprehensive collection of Pixel Attribution methods for Computer Vision.

Jacob Gildenblat 6.5k Jan 1, 2023
Algorithms for monitoring and explaining machine learning models

Alibi is an open source Python library aimed at machine learning model inspection and interpretation. The focus of the library is to provide high-qual

Seldon 1.9k Dec 30, 2022
Bias and Fairness Audit Toolkit

The Bias and Fairness Audit Toolkit Aequitas is an open-source bias audit toolkit for data scientists, machine learning researchers, and policymakers

Data Science for Social Good 513 Jan 6, 2023
A library for debugging/inspecting machine learning classifiers and explaining their predictions

ELI5 ELI5 is a Python package which helps to debug machine learning classifiers and explain their predictions. It provides support for the following m

null 2.6k Dec 30, 2022
treeinterpreter - Interpreting scikit-learn's decision tree and random forest predictions.

TreeInterpreter Package for interpreting scikit-learn's decision tree and random forest predictions. Allows decomposing each prediction into bias and

Ando Saabas 720 Dec 22, 2022
A collection of infrastructure and tools for research in neural network interpretability.

Lucid Lucid is a collection of infrastructure and tools for research in neural network interpretability. We're not currently supporting tensorflow 2!

null 4.5k Jan 7, 2023
Visualizer for neural network, deep learning, and machine learning models

Netron is a viewer for neural network, deep learning and machine learning models. Netron supports ONNX (.onnx, .pb, .pbtxt), Keras (.h5, .keras), Tens

Lutz Roeder 20.9k Dec 28, 2022
tensorboard for pytorch (and chainer, mxnet, numpy, ...)

tensorboardX Write TensorBoard events with simple function call. The current release (v2.1) is tested on anaconda3, with PyTorch 1.5.1 / torchvision 0

Tzu-Wei Huang 7.5k Jan 7, 2023
TensorFlowTTS: Real-Time State-of-the-art Speech Synthesis for Tensorflow 2 (supported including English, Korean, Chinese, German and Easy to adapt for other languages)

?? TensorFlowTTS provides real-time state-of-the-art speech synthesis architectures such as Tacotron-2, Melgan, Multiband-Melgan, FastSpeech, FastSpeech2 based-on TensorFlow 2. With Tensorflow 2, we can speed-up training/inference progress, optimizer further by using fake-quantize aware and pruning, make TTS models can be run faster than real-time and be able to deploy on mobile devices or embedded systems.

null 3k Jan 4, 2023